We’re going to be setting up a text editor called Visual Studio Code, or VS Code, to remotely work on the CSE computers without needing a VNC client!
Why are we doing this?
You’ve likely used a program called TigerVNC to connect to the School of CSE’s computers before, which provides you a visual interface with a full desktop environment. f you’re currently doing COMP1511, I would strongly advise you to use the provided desktop environment and gedit over TigerVNC for the first week, just to familiarise yourself with it.
The solution we’re about to go through provides a more seamless coding experience without having to load a full visual interface from CSE computers. This has the added benefits of not being affected by compression, especially if you have a poor connection, and being able to use a more fully fledged editor.
Obligatory disclaimer: Despite myself being employed by the School of CSE at the time of writing, this does not necessarily reflect the views of my employer. I am also not responsible if your computer blows up!
Getting started 🎉
First of all, we’re going to acquaint ourselves with Visual Studio Code, or VS Code, a text editor.
- If prompted to do so during the installation process, select the checkbox which says ‘Add to PATH’.
- Restart your computer once you’re done.
You should now have VS Code installed! You can now edit files on your own computer, but that’s not quite what we want - our goal is to edit files on CSE machines.
Our friend, SSH 🙃
Some cool computer scientists invented a way to allow you to communicate with remote computers over the internet called SSH, or Secure Shell. This allows us to edit files on another computer, such as the CSE servers, and run commands through a terminal on CSE servers.
Luckily for us, we can add an extension to VS Code to use SSH to connect to CSE machines.
Part 1: Installing the extension
- Open VS Code.
- Open the Extensions menu. You can access it using
Ctrl+Shift+X. - Search for and install the SSH FS extension. Once this is done, you might be prompted to reload the window. [^2]
 |
|---|
| Installing the SSH FS extension. |
Part 2: Configuring to connect to CSE
Now that we’ve installed, there should be a new icon in the menu bar on the left of your VS Code window.
On macOS? Use the Cmd key instead of Ctrl.
Select the newly added SSH FS icon. This is the menu button in blue in the below image.
Under the Configuration section, select the button to create a new configuration.
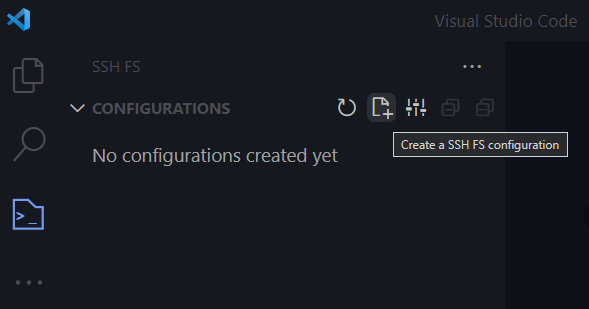
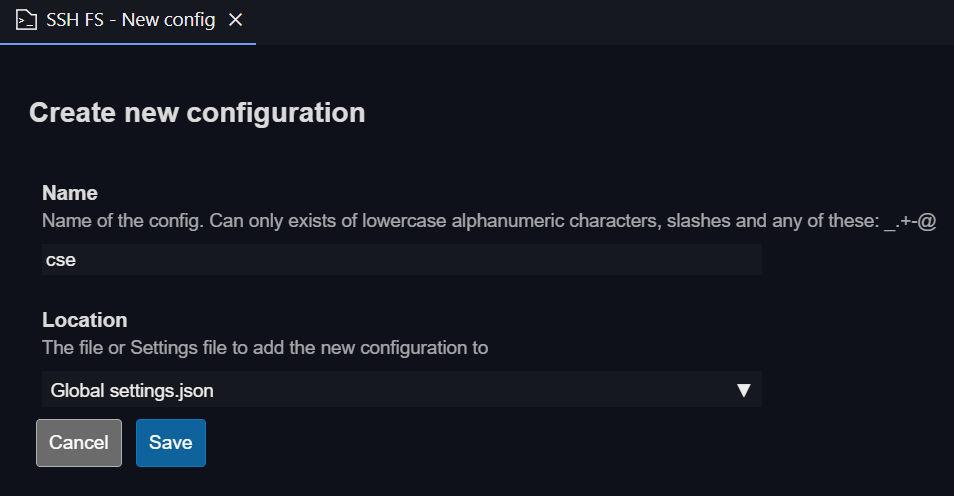
Adding a new configuration under the SSH FS menu. Give the configuration a name, and click save. A good name might be ‘cse’.
Creating the new configuration. We’ll now need to edit this configuration. In the new screen that pops up, fill out the following options:
- Host: Set this to be
login.cse.unsw.edu.au. - Port: This should be set to
22. - Root: Set this to
~, which is the key that’s generally above the tab key on most keyboards. - Username: This should be your zID, for example,
z5123456.
Leave everything else blank, scroll down, and click save.
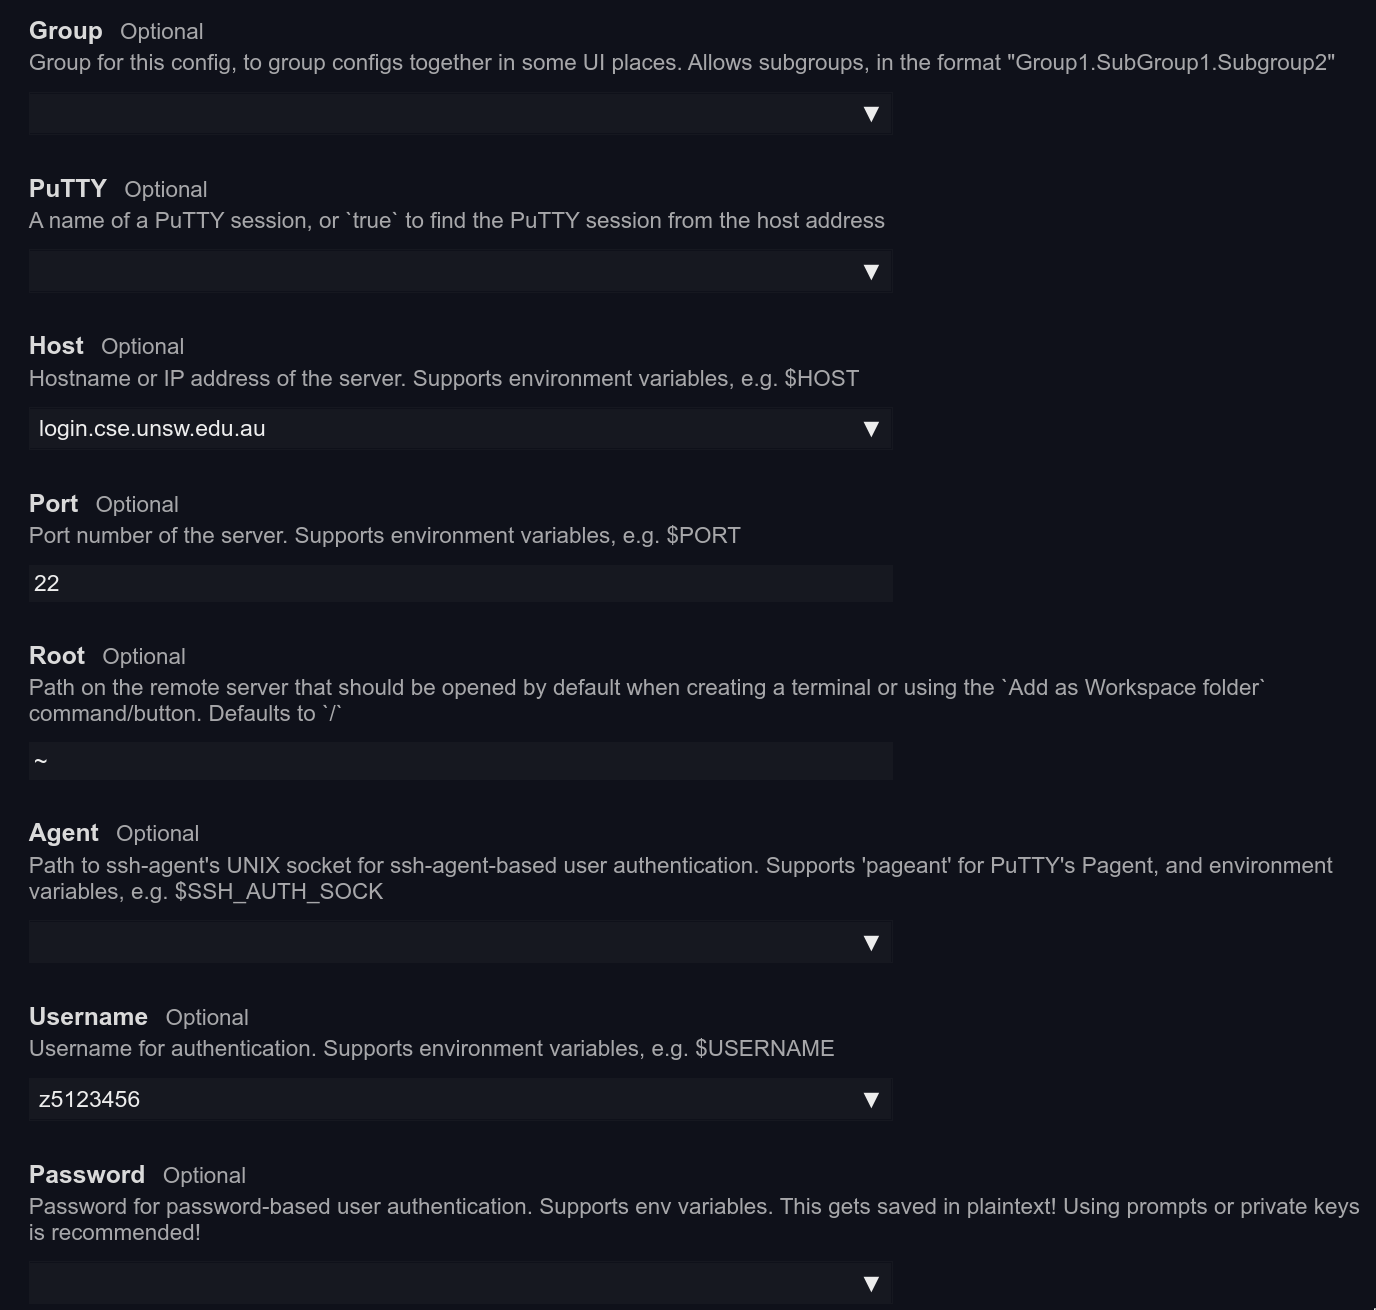
A sample configuration for z5123456. - Host: Set this to be
Part 3: Using our new configuration to connect
We’re finally at the part where we get to connect to CSE machines.
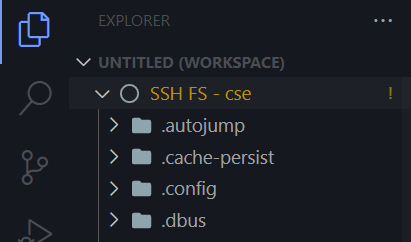
Head back to the SSH FS menu. Our new CSE configuration should be listed.
Click the button to ‘add as workspace folder’.
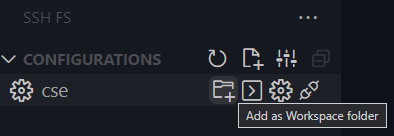
Add CSE as a workspace folder. Enter your UNSW password when prompted.
Your CSE files should now all be visible in the sidebar! You can double-click to open them and edit them, or use Ctrl+N and Ctrl+S to create new files.
 |
|---|
| We should now be able to see our CSE files! |
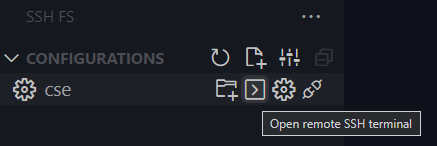
There’s a good chance that you also need a terminal to get your work done. To do this,
- Head back to the SSH FS menu, where our CSE configuration is listed.
- Click the ‘open remote SSH terminal’ button. A terminal pane should now open. You can use commands like
cdandlsjust as you’re used to. Instead of usinggeditnow, we can create new files inside VS Code.
 |
|---|
| This button should launch a terminal on the bottom of our window. |
You can open as many new terminals as you want.
Part 4 (optional): Using the code command to open files
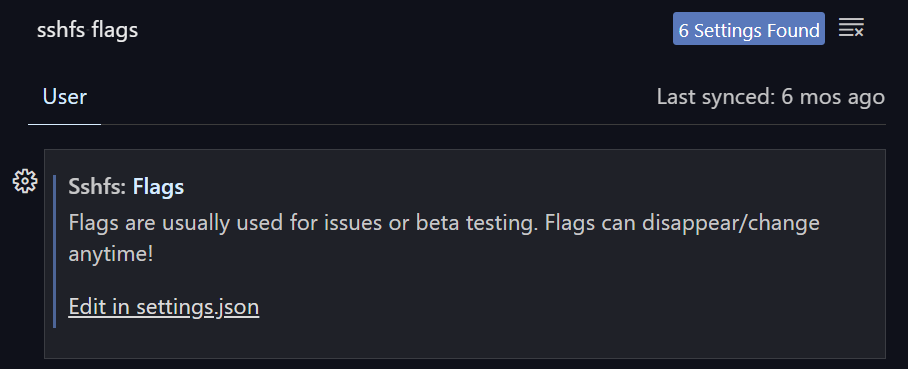
We can enable a setting to allow us to use the code command in SSH terminal to open files (a bit like using the gedit command to open a new window containing a file):
Open the Settings menu. This can be accessed by using Ctrl+,, or the Settings icon in the bottom left of your window.
Search for the ‘sshfs flags’ setting, and select ‘Edit in settings.json’.
The following option should show up in our search. 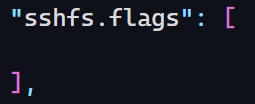
A new tab should open, presenting an empty set of square brackets like this. There may or may not be a comma there. Add the following in between the square brackets:
"REMOTE_COMMANDS"(be sure to include the quotation marks), and use Ctrl+S to save the file.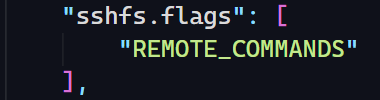
You should now have this in between the square brackets. Don’t add a comma if there wasn’t already one there.
You should now be able to use the code command in your terminal the next time you connect.
Bonus coins: Avoiding the need to type your password each time
Being prompted to enter our password each time we connect is slightly annoying. Storing our password in the config file isn’t ideal either, so our solution involves using a magic pair of keys.
Part 5: Generating a keypair
Windows 10
- Open Windows Powershell. You can do this by entering
powershellin Search. - Generate a keypair. Use the command
ssh-keygen -t ed25519in Powershell. - You’ll be asked where you want to save the key. Leave this blank, and press Enter.
- You’ll be asked to set a password. Leave this blank, and press Enter again. Do the same when you are asked to confirm it.
Linux/macOS
- Open the Terminal.
- Generate a keypair. Use the command
ssh-keygen -t ed25519. - You’ll be asked where you want to save the key. Leave this blank, and press Enter.
- You’ll be asked to set a password. Leave this blank, and press Enter again. Do the same when you are asked to confirm it.
Your computer has now generated two files: id_ed25519 and id_ed2559.pub. The id_ed25519.pub file is what’s called a public key, while id_ed25519 is a private key. Never share (or really, even open) your private key. It’s called a private key for a reason (that is, because you should share it with the world).
Part 6: Using the keypair on CSE machines
For this to work, we need to give the CSE machines the public half of your keypair. If you’re on Linux/macOS, this should be pretty easy, but if you’re on Windows 10, there’s a few more steps.
Windows 10
Open Powershell, just like in Part 4. You can use the same window if you still have it open.
Run the following command in Powershell, replacing with your own zID. Enter your password when prompted. (Yes, the entire thing should be one command.)
ssh z5555555@cse.unsw.edu.au "mkdir ~/.ssh;chmod 700 ~/.ssh;touch ~/.ssh/authorized_keys;chmod 600 ~/.ssh/authorized_keys"Run the following command, again replacing with your own zID. Enter your password when prompted. (Again, this is all one command, so be sure to copy-paste the whole thing!)
type $env:USERPROFILE\.ssh\id_ed25519.pub | ssh z5555555@cse.unsw.edu.au "cat >> .ssh/authorized_keys"Attempt to connect with
ssh z5555555@cse.unsw.edu.au, replacing with your own zID. If we were successful, you should not be prompted for your password!
Linux/macOS
Open the Terminal.
Run the following command, replacing with your own zID.
ssh-copy-id z5555555@cse.unsw.edu.auEnter your password. You’ll be asked for your CSE password one last time, for the key to be copied over.
Attempt to connect with
ssh z5555555@cse.unsw.edu.au, replacing with your own zID. If we were successful, you should not be prompted for your password!
Voila! You had it a bit easier here.
Part 7: Telling the SSH FS extension to use your new keys
Open the SSH FS menu in VS Code, yet again.
Select the ’edit configuration’ button for your CSE configuration.
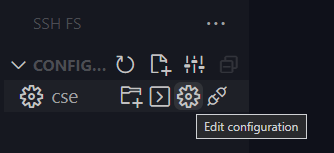
Editing the CSE configuration. Scroll down to the ‘private key’ option.
- If you’re on Windows, set this to
$USERPROFILE/.ssh/id_ed25519. - If you’re on macOS or Linux, set this to
$HOME/.ssh/id_ed25519.
- If you’re on Windows, set this to
Be sure to scroll down and click save.
Connect again, just like in Part 3. You shouldn’t be prompted for your password now!
Other (boring) stuff: Starting in a different folder
If you hate clutter and don’t want to your entire CSE home directory (say, for example, you have a folder ~/comp1511 in which you do all your work in), you can edit your SSH FS configuration to start in a different root directory, such as ~/comp1511 instead of ~, or even just make a whole new configuration for this.
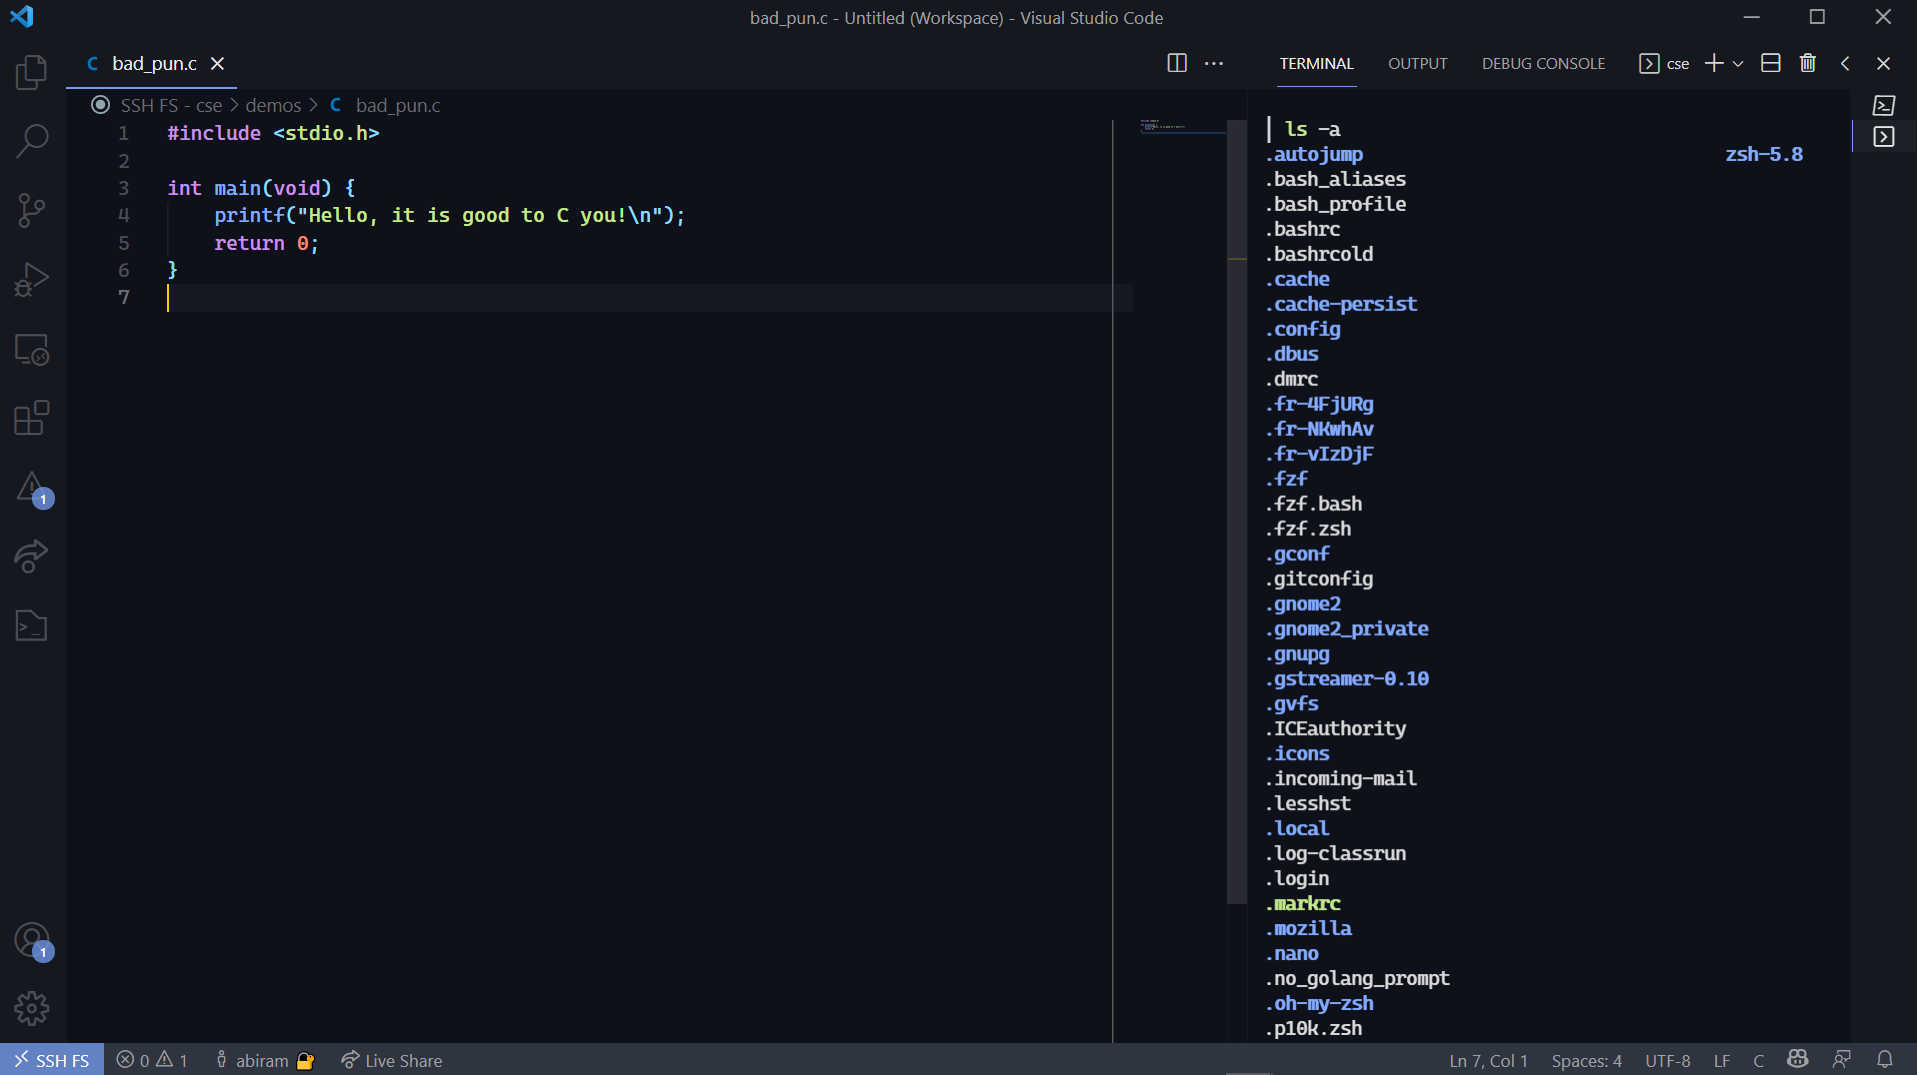
Making VS Code even cooler
 |
|---|
| I personally don’t code on CSE machines, but my VS Code looks like this! |
Editor rulers
The COMP1511 style guide requires you to make sure your lines of code aren’t longer than 80 characters (and it’s good practice to do so!). You can make VS Code show a handy little ruler to make sure your lines aren’t too long.
- Open the settings.json file. To do this, press Ctrl+Shift+P and search for Open Settings (JSON). A file should open.
- We need to add to this file. You should see that the last line is a curly brace like this:
}. What we want to do is add a comma to the second last line. Then, create a new line after the comma, and paste this:
"[c]" :{
    "editor.rulers" : [
        80
    ]
}
Other extensions
VS Code has heaps of themes and extensions. Some which I use:
- Material Icon Theme.
- Dainty and Dainty - Material Theme. I personally use Dainty - Material Theme Ocean.
- Discord Rich Presence. If you use Discord, then it’ll update your currently playing status with details of what you’re coding on. If one of your friends tries to drag you into a voice call, you can just open up VS Code and tell them that you’re busy working 😛
It’s worth noting that several extensions may not work due to the nature of how the SSH FS extension works - if there’s a particular extension you need, and you’re a more advanced user, try following my other guide instead.
Troubleshooting SSH FS
Error running command sshfs.add
Be sure that you’ve used the correct name for the Host under your configuration, such as login.cse.unsw.edu.au for example. If this doesn’t work, try using login.cse.unsw.edu.au, or cse.unsw.edu.au instead.
Have feedback, or want to reach out?
If you’ve spotted an error, or have any suggestions or improvements that I can make, feel free to contact me! My details are at the bottom of this page.
Acknowledgements
- hexDoor for discovering and filing an issue with the SSH FS extension’s method of determining startup directory.
- The maintainers and contributors of relevant open source software, particularly SchoofsKelvin for their particular quick response to issues raised by the above people and myself.